May 17, 2007

Game Clan logotype

Adobe Photoshop Tutorial

click on images to see their original size

Learn to create a stylish Game Clan logo.


Let’s start with creating a new document, with 400
px by 200px with a #303030 background color.


Now, using a Ellipse Shape Tool, draw a circle (the color is not important, I used white)


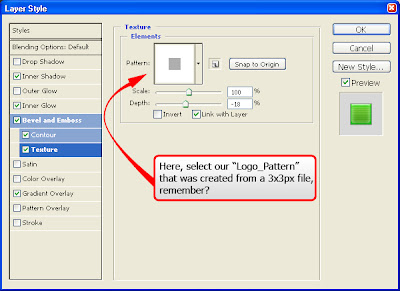
Create a new document 3x3 px, create a new layer in it, delete background, and using a Pen Tool (1px and #80b950 color) put a point right in the middle, as it is shown (the image is zoomed):
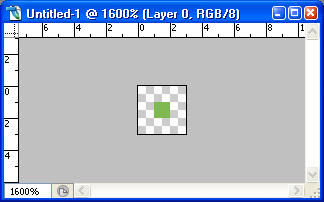


After that, go to Edit > Define Pattern, name it for example “Logo_Pattern” and click OK.
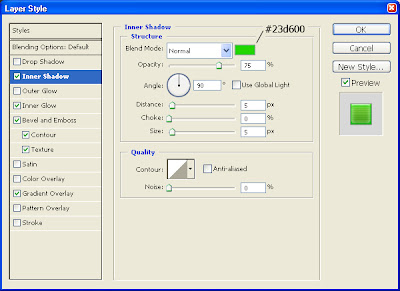
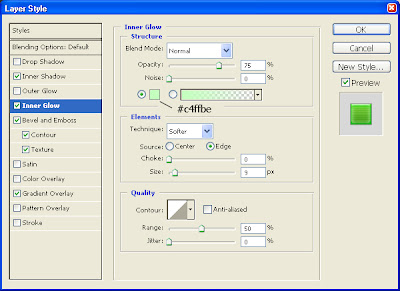
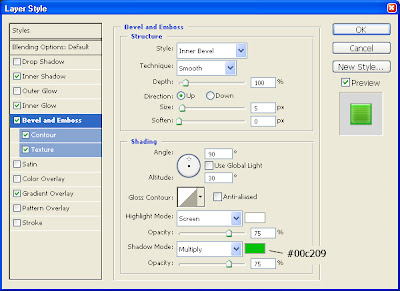
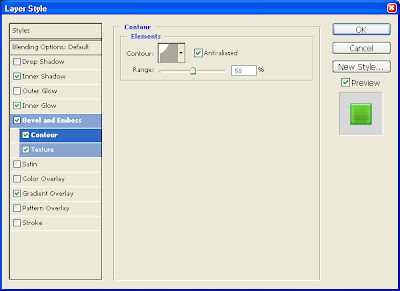
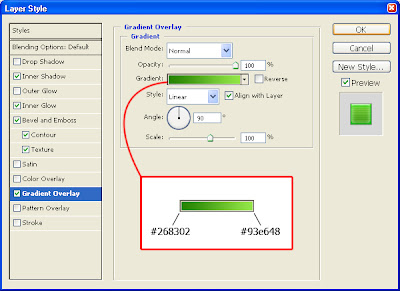
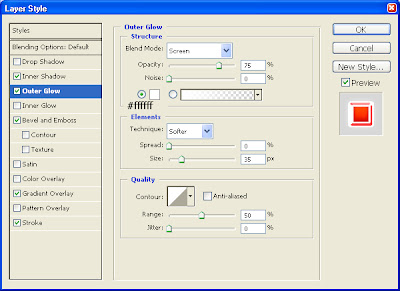
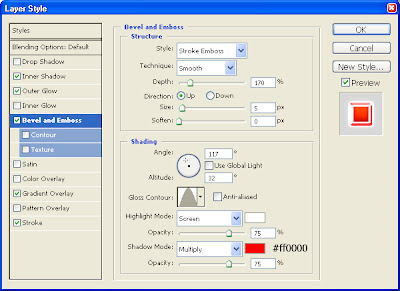
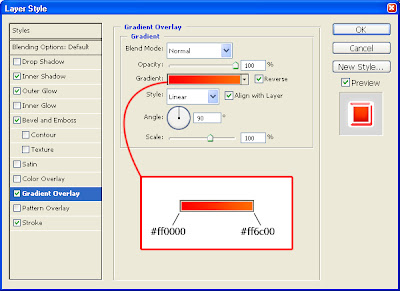
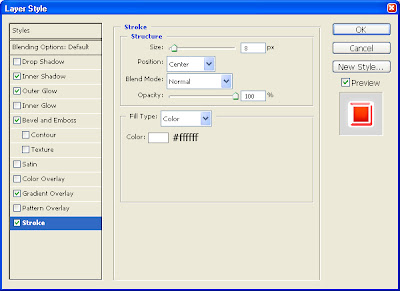
Now, lets return to our previous document with a circle. Apply to the circle the following settings:


That is what we must get:


Now, select our circle by Ctrl+Click on the layer icon in the layer palette (F7):


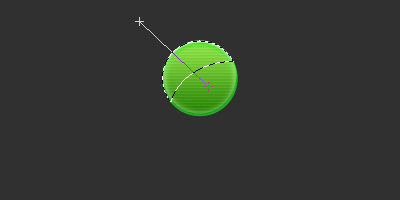
Using Elliptical Marquee Tool – Subtract from selection, cut the part of a selection as it is shown:


Draw this gradient (from white to transparency) as it is shown below:


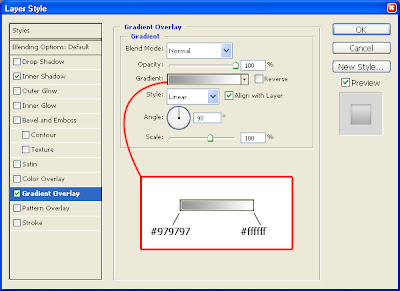
Now using, a Pen Tool, create a Shape - triangle, and apply to it the same settings you had applied to the circle, but in the Emboss effect change Depth to 1 and Size to 0. That is how our triangle must look like:


Now duplicate that triangle, rotate it upside down, and place exactly as the first one, but at the bottom of our circle:


Select both triangle layers in the layer palette, duplicate them, and rotate by 90 degrees:
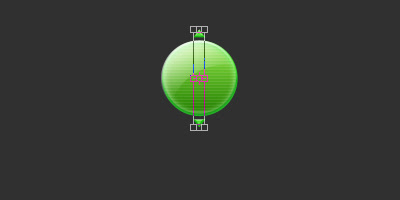


Now, select all 4 layers in the layer palette, duplicate them, and rotate as it is shown below:


After that, using a Custom Shape Tool, draw a Paw shape:


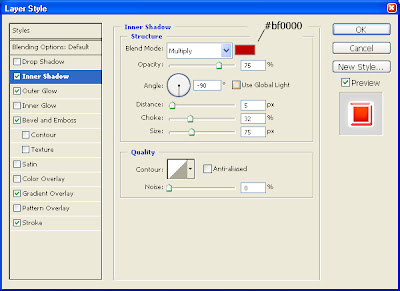
Apply to the Paw layer the following effects:
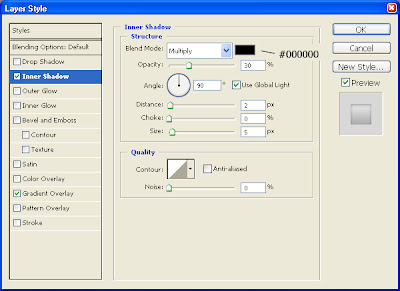


That is what you must get:


Our logotype is ready, now just add a clan name. (I did it with a white Compact font):



Copyright © http://megatutorials.blogspot.com

AddThis Social Bookmark Button

May 4, 2007

Mother's Day Greeting e-Card

Adobe Photoshop Tutorial

click on images to see their original size

In this tutorial you will learn to create a Mother's Day Greeting e-Card. (click on the image below, to see animation)


So, let’s start with creating a new document, with 500px by 400px with any background color. Unlock our background layer by double clicking on a layer icon, and pressing ok. And apply to it these settings:


Now, using a Custom Shape Tool, select a Heart shape, and draw it as it is shown below (color is not important):


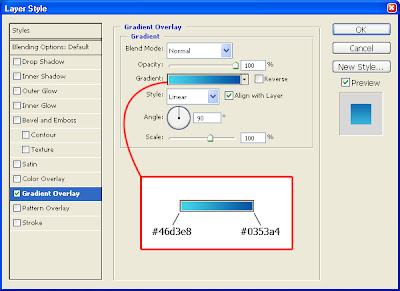
Apply to the heart these settings:


That is what you should see:


Now select our Heart Layer by Ctrl+click on a layer icon, select Eliptical Marquee Tool (subtract from selection) and cut the bottom of a selection as it is shown below:


Create a new layer (name it Gradient_layer) and fill it with this gradient (After you fill it, pres Ctrl+D to deselect) :


Click on an icon Add Layer Mask in a layers palette, to ad a mask to our Gradient_layer.


Now drug a black to white gradient on our mask, as it is shown below:


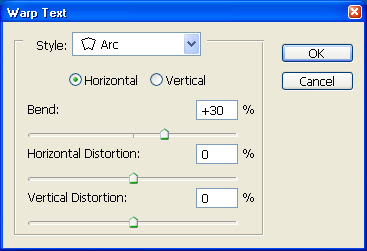
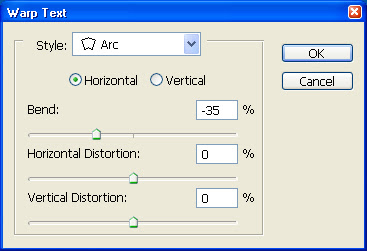
The Heart is ready. Now, create two text layers (I’ve used EpsilonCTT font), one with a word “Happy” and another with words “Mother’s Day”. Arrange them as I did, and create warped text with the next settings to our two text layers respectively:


To “Happy” layer


To “Mother’s Day” layer


That is what we got by now:


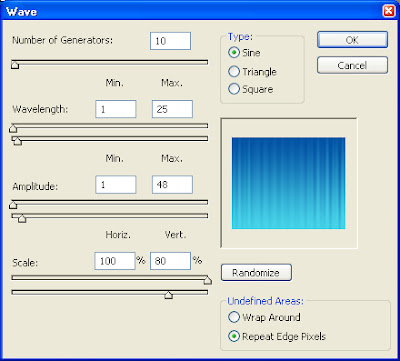
Now, to our background layer apply this filter: Filter>Distort>Wave with this settings to create a curtain effect:


The next step is to create another heart as we created the main one, but this time it must be white color and smaller. Set the Opacity to 30% and clone it all around the main Heart, as it is shown below:


Name our small heart layers as 1, 2, 3 … 7, select all 7 layers in the layer palette and duplicate them. After you duplicated it, select one by one “copy” layers, and scale to 50% each of them (Ctrl+T), so our card has to be look like this:


So, if you don’t want to add some animation to your e-card, you can stop here. For those who want to animate – let’s go further.

Export our psd file to Adobe Image Ready by clicking on an icon in the Tools palette


In Adobe Image Ready, in Animation palette, duplicate current frame by pressing Duplicates Current Frame icon 6 times so that we get 7 frames.


Now, in each frame only one copy layer must be visible in this order: in 1 frame – “1 copy” layer must be visible, in 2 frame – “6 copy” layer must be visible, in 3 frame – “4 copy” layer must be visible, in 4 frame – “7 copy” layer must be visible, in 5 frame – “2 copy” layer must be visible, in 6 frame – “5 copy” layer must be visible, in 7 frame – “3 copy” layer must be visible.

After that, go to File>Save Optimized As> and save our animated e-card as a GIF file. That’s it! :)


Copyright © http://megatutorials.blogspot.com
AddThis Social Bookmark Button