Apr 17, 2007

Stylish search bar.

Adobe Photoshop Tutorial

click on images to see their real size

In this tutorial, you will learn to create a stylish search bar for a website.


Let’s start with creating a new document, with 450px by 200px. As a background I used a gradiend from # 808080 to # 616161.


Select Rounded Rectangle Shape Tool with the following settings, and draw a shape:


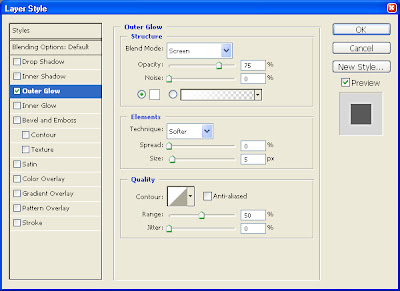
Name that layer as “Shape 1”. Duplicate it by pressing Ctrl+J and name duplicated layer “Shape 2”. “Shape 2” layer must be above “Shape 1” layer. Now, apply to “Shape 2” layer following settings:
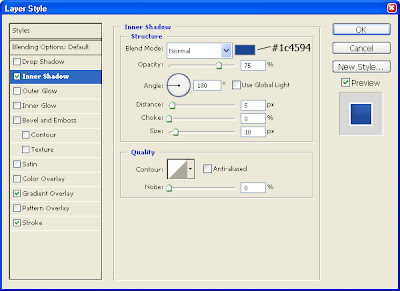
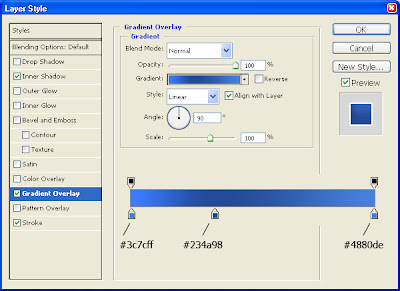
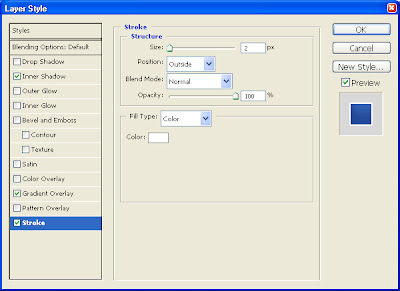


That is how it must look like:
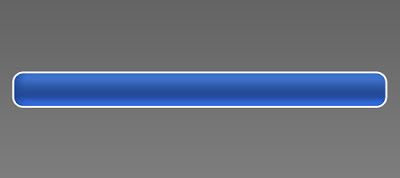


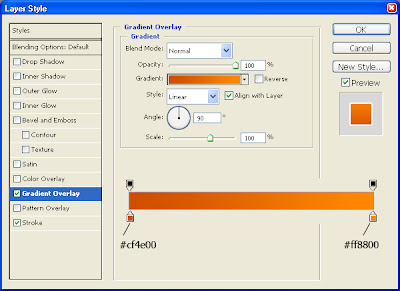
Now, apply the following settings to the “Shape 1” layer:


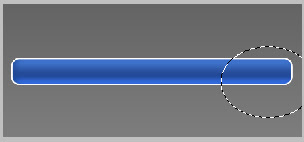
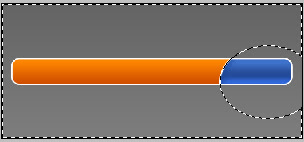
Rasterize “Shape 2” layer, select a part of it with a Elliptical Marquee Tool (as it is shown below), press Ctrl+I to invert the selection, press the Delete button and after that – Ctrl+D to deselect:
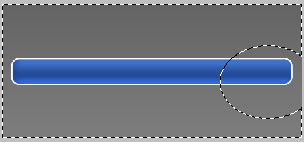


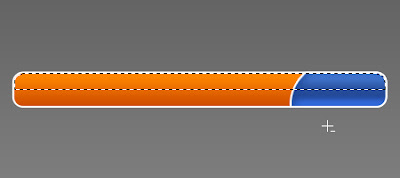
Select the “Shape 1” layer by Ctrl+Click on it, and with a Rectangular Marquee Tool – cut the bottom of the selection, like this:


Create a new layer (above the “Shape 1” layer), fill our selection with white color and set the layer transparency to 30%. Press Ctrl+D to deselect:
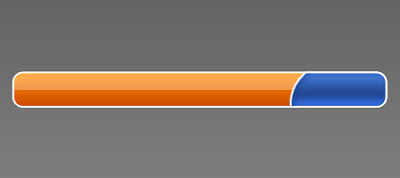

Now, with a Rectangular Shape Tool draw a shape where the input field should be. And with a Arial font 17 pt write a “search” word in a button. Here is the result


Copyright © http://megatutorials.blogspot.com

AddThis Social Bookmark Button

Apr 9, 2007

Stylish website navigation.

Adobe Photoshop Tutorial

click on images to see their real size


In this tutorial, you will learn to create a stylish website navigation design in Photoshop.


Let’s start with creating a new document, with160px by 220px, background is not important. Now, select your Rectangular Shape Tool and create a rectangle that is 40px tall, and about 160px wide. Color doesn’t matter, because we will apply the following settings:


Create a new document with 6 px by 5 px, clear the background, select a Pencil Tool (Master Diameter is 1px) with a color # 939393, and draw two points as it is shown:


Now go to Edit > Define Pattern, name it for example as “new_pattern” and click OK. After that, return to previous document, select our rectangle by Ctrl + click on a layer icon in a layer palette, create a new layer (name it also for example new_pattern), and than go to Edit > Fill:


After filling, go to Filter > Blur > Gaussian Blur with radius 0,3px and click OK. The result must look like this:


Now, create a new layer, select a Pencil Tool (Master Diameter is 2px) with a color # 696969 and draw a line at the bottom of rectangle. Change color to # 808080 and draw a line at the top of our rectangle. Like here:


Select our three layers, and group them by pressing Ctrl + G. Clone them by Alt + Drag to make 5 groups and arrange them as on the following picture:


Select the rectangular in the second group and apply this settings.


In the same group select the layer “new_pattern” and apply the following settings: color overlay # ffffff and set the layer opacity to 25%.

That is how one of our buttons is going to look like when it is selected, but that is not all:


It the same group #2 create a new layer, select a Pencil Tool (Master Diameter is 1px) with a color # ffffff and draw some kind of an arrow, and place it as it is shown below:


Now, select a strict pixel font (I’ve used the Alaska font) and write down your menu. That's it!


Copyright © http://megatutorials.blogspot.com

AddThis Social Bookmark Button

Apr 5, 2007

Toxic text effect.

Adobe Photoshop Tutorial

click on images to see their real size


Creating a text effect as like a toxic waste was split on an asphalt.


Let’s start with opening a new document with a size 400x200 px. Fill it with a #505662 color:


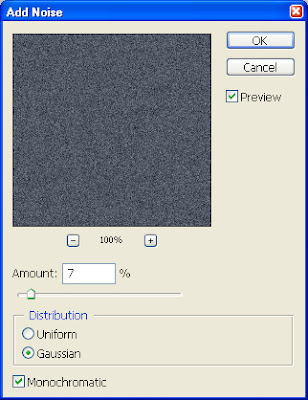
Apply to it the following Noise settings, and our asphalt background is ready:


Now, create a new layer, and write a word “TOXIC” or whatever you want. I’ve used the Impact font with these settings:


Rasterize it, and set background color to #30ff00 and foreground color doesn’t matter, like here:


After that, go to Filter > Brush Strokes > Spatter, and apply there the following settings – Spray Radius: 15, and Smoothness: 5, then click OK. You should see something like that:


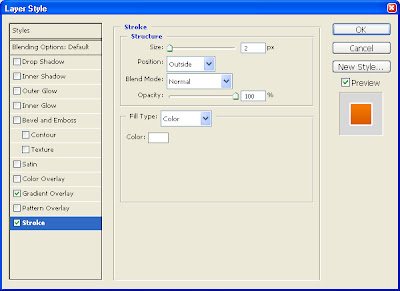
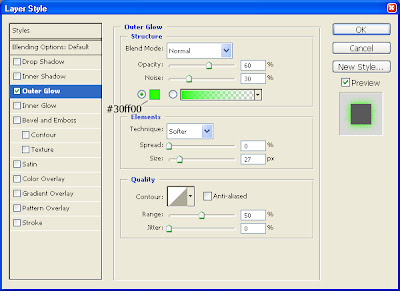
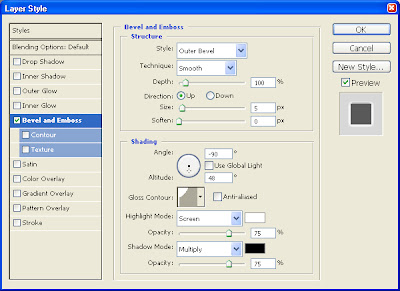
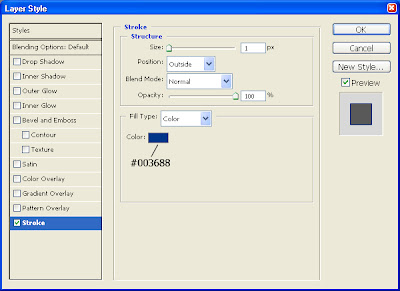
Now add this layer style:


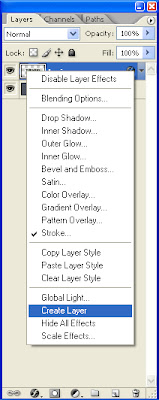
And right click on an “Indicates layer effects” icon, then choose “Create layer”


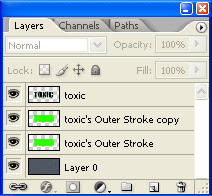
Duplicate the Stroke layer:


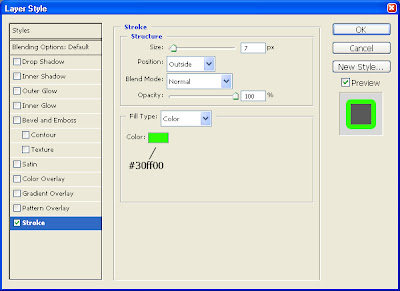
Now apply to our “toxic's Outer Stroke copy” layer these settings:


And to our “toxic's Outer Stroke” layer – these settings:


Voila:


Copyright © http://megatutorials.blogspot.com

AddThis Social Bookmark Button

Apr 3, 2007

Stylish “login form” design.

Adobe Photoshop Tutorial

click on images to see their real size


In this tutorial, you will learn to create a stylish "login form" design in Photoshop.


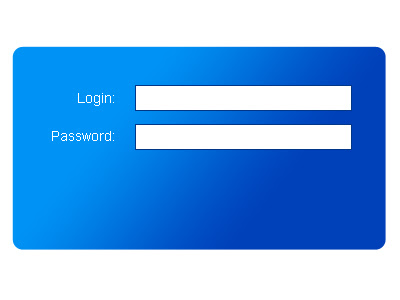
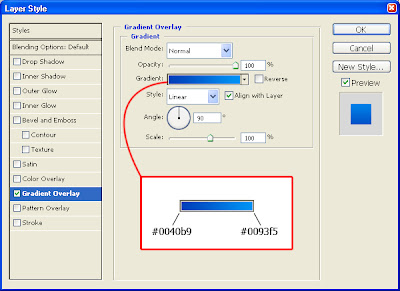
Let’s start with creating a Rounded Rectangle with a Rounded Rectangle tool (the settings are shown below and the color doesn’t matter) and applying to it the following gradient overlay settings:


Now create two new layers, draw in each of them white Rectangle with a Rectangle tool and apply to them the following stroke settings. They are going to be our fields to fill.


Write the words “Login:” and “Password” using the following settings and place them as it is seen on the picture:


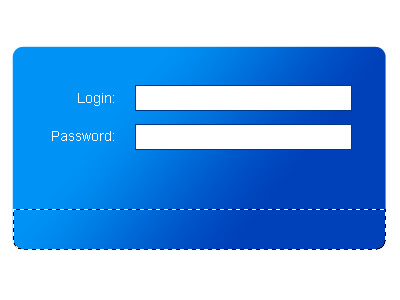
Now select our Rounded Rectangle (Ctrl + click on the layer) and with a Rectangular marquee tool (M) – cut the selection as it is shown below. Don’t forget to apply these settings to Rectangular marquee tool (M):


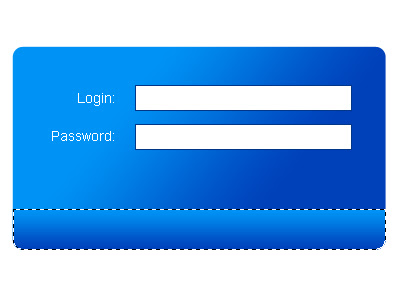
Create a new layer, fill our selection with any color, and apply to it these settings:


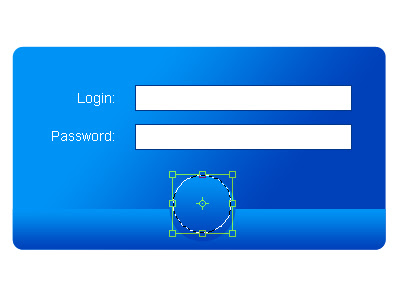
Deselect (Ctrl + D), and create a new layer. Draw an Ellipse with an Ellipse tool (the settings are shown below and the color doesn’t matter) and apply to it the following gradient overlay settings:


Now select our Ellipse (Ctrl + click on the layer), go to menu Select > Transform selection and transform it like on this picture:


Press enter, create a new layer, and paint inside our selection with a gradient tool as it is shown:


Press Ctrl + D to deselect.

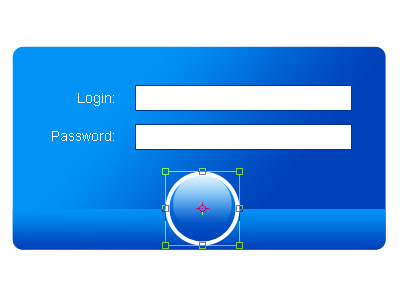
Now, duplicate our Ellipse. Paint the previous one in white color, and transform it as it is shown here:


It must look like this now:


The next step is to select the white Ellipse (Ctrl + click on the layer) and with a Rectangular marquee tool (M) cut its bottom. Only the upper part must remain selected:


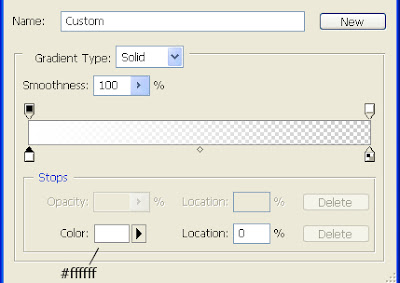
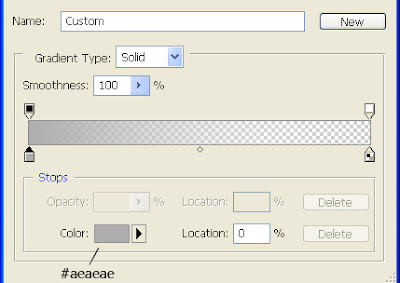
Now create this gradient:


Create a new layer (right next to the white Ellipse), and paint with a gradient inside our selection, to obtain this result:


Select a Custom Shape Tool, choose an arrow, with the following settings, and draw it on our orb-button:


Apply these settings to our arrow, to make it shine:


So, here is the result:


Copyright © http://megatutorials.blogspot.com

AddThis Social Bookmark Button