Nov 25, 2007

Creating a stylish green logo.

Adobe Photoshop Tutorial.

click on images to see their original size!

Learn to create a stylish green logotype.


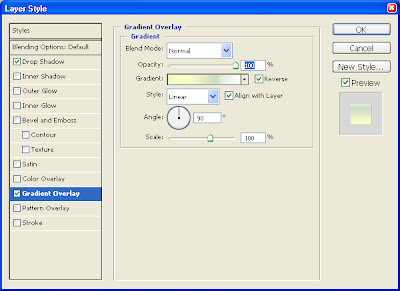
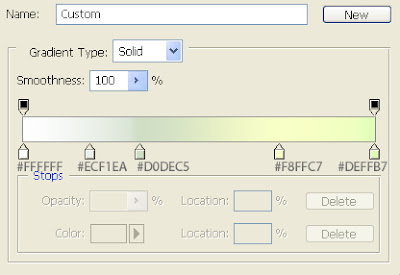
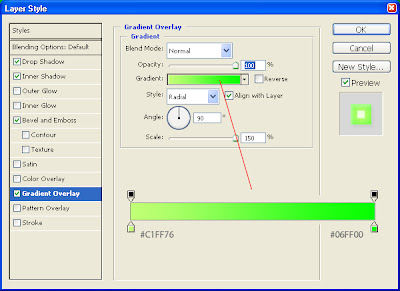
Let’s start with opening a new document 350x200px. Create a new layer, and fill it with this gradient:
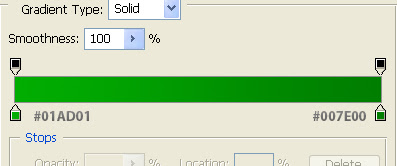



Now, take a text tool, and write whatever you want. I’ve wrote a “STYLISH LOGO” words, using a Agency FB font, bold, 45 pt. Leave some space between the words:


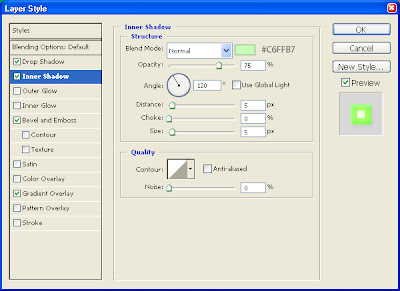
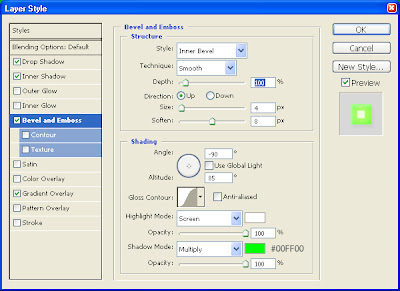
Now, apply the following effects to our text layer:
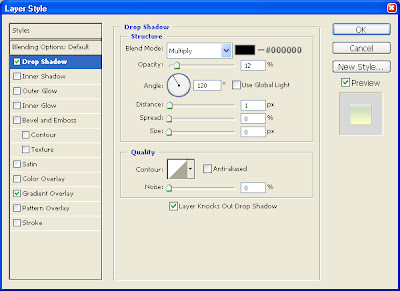


That is what you must get:


Now, take the Custom Shape Tool, and draw a star shape:


Apply to it the following settings:
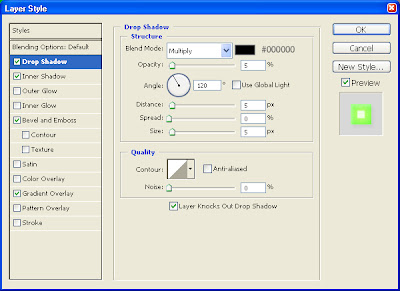


That is what we must get:


Now, Ctrl+click on a layer icon to select it, go to Select > Modify > Contract by 1 px, press ok.


Create a new layer, take a Gradient tool wit the following settings:
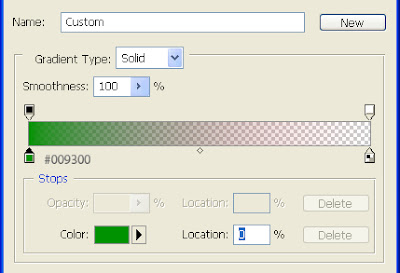


And drag it from a different sides of our star. That is what we must get:


Now, again go to Select > Modify > Contract by 1 px, create a new layer, take a gradient tool from white to transparency, and drag it from upper left side of our star to its center. Press Ctrl+D to deselect.


Now, duplicate our star layer. Delete all effects in a duplicated layer, send him behind all layers except background, press Ctrl+T to transform it, and make it bigger, as it is shown. After that, change its Opacity to 7%. That’s it!


Copyright © http://megatutorials.blogspot.com

AddThis Social Bookmark Button

Oct 13, 2007

Creating photorealistic waves in Flash.

Flash Tutorial

click on images to see their original size

PHOTOREALISTIC FLASH WAVES PREVIEW IS HERE!


Let’s start with taking a picture of sunset, like this one:


Save it as a sky.jpg

After that, open it in photoshop, and go to Edit – Transform > Flip vertical. Save this image as a “water”


Each of our two images is 406x172 px,.

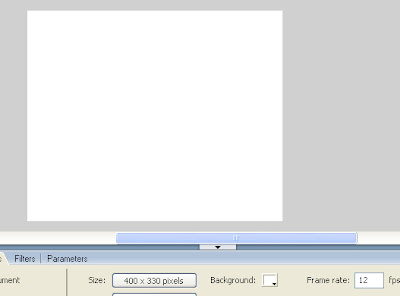
Now, open Flash, and create a new document 400x330 px.


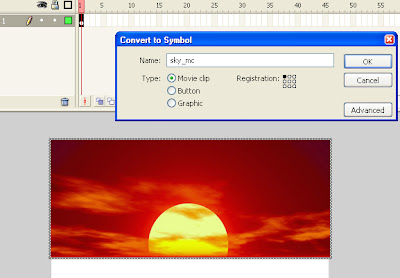
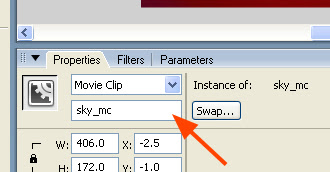
Press Ctrl+R (import), and import a sky.jpg file. Plase it in the upper part of our document, make sure it is selected, press F8 to make it movie clip, name it sky_mc.


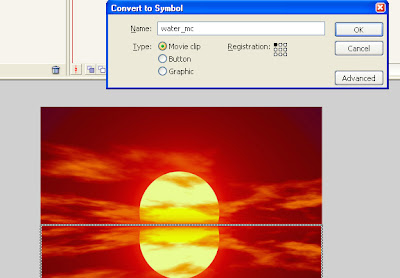
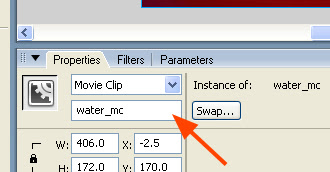
Create new layer, press again Ctrl+R, import water.jpg file, place it under “sky” picture, also convert it to movie clip, and name it as a water_mc. Put the layer under the sky layer.


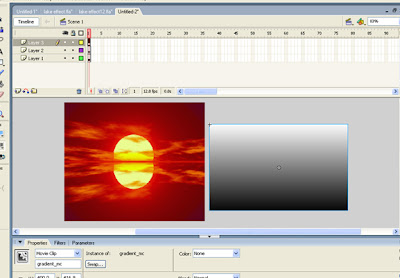
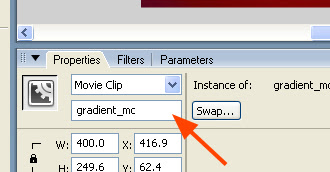
Create new layer, out of document draw a rectangle (400 px with) and paint it with a gradient from white to black. Make sure it is selected, press F8 to convert it to movie clip and name it as a gradient_mc.


Now click on each image, and check their names here:


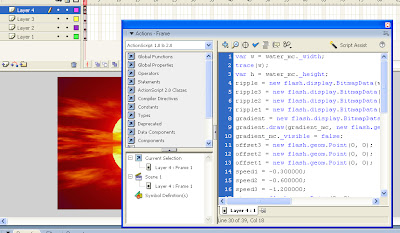
After that, create a new layer, press F9, and in the window that appeared – paste this script.


var w = water_mc._width;
trace(w);
var h = water_mc._height;
ripple = new flash.display.BitmapData(w, h);
ripple3 = new flash.display.BitmapData(w, h / 2);
ripple2 = new flash.display.BitmapData(w, h / 4);
ripple1 = new flash.display.BitmapData(w, h / 4);
gradient = new flash.display.BitmapData(ripple.width, ripple.height);
gradient.draw(gradient_mc, new flash.geom.Matrix(1, 0, 0, 1, 0, 0));
gradient_mc._visible = false;
offset3 = new flash.geom.Point(0, 0);
offset2 = new flash.geom.Point(0, 0);
offset1 = new flash.geom.Point(0, 0);
speed1 = -0.300000;
speed2 = -0.600000;
speed3 = -1.200000;
pt = new flash.geom.Point(0, 0);
rect = new flash.geom.Rectangle(0, 0, ripple.width, ripple.height);
this.onEnterFrame = function ()
{
offset1.y = offset1.y + speed1;
offset2.y = offset2.y + speed2;
offset3.y = offset3.y + speed3;
ripple3.perlinNoise(0, 15, 1, seed, true, true, 1, true, [offset3]);
ripple2.perlinNoise(0, 10, 1, seed, true, true, 1, true, [offset2]);
ripple1.perlinNoise(0, 5, 1, seed, true, true, 1, true, [offset1]);
ripple.copyPixels(ripple1, r1rect, r1pt);
ripple.copyPixels(ripple2, r2rect, r2pt);
ripple.copyPixels(ripple3, r3rect, r3pt);
ripple.merge(gradient, rect, pt2, 127, 127, 127);
dMap = new flash.filters.DisplacementMapFilter(ripple, pt, null, 1, 100, 100, "WRAP");
water_mc.filters = [dMap];
};
r1rect = new flash.geom.Rectangle(0, 0, ripple1.width, ripple1.height);
r2rect = new flash.geom.Rectangle(0, 0, ripple2.width, ripple2.height);
r3rect = new flash.geom.Rectangle(0, 0, ripple3.width, ripple3.height);
r1pt = new flash.geom.Point(0, 0);
r2pt = new flash.geom.Point(0, ripple1.height);
r3pt = new flash.geom.Point(0, ripple1.height + ripple2.height);

That’s it!!!

PHOTOREALISTIC FLASH WAVES PREVIEW IS HERE!

You can download an original *.fla file with layers here.


Copyright © http://megatutorials.blogspot.com

AddThis Social Bookmark Button

Aug 27, 2007

Jungle camouflaged text effect.

Adobe Photoshop Tutorial

click on images to see their original size

Learn to create a jungle camouflaged text.


Let’s start with opening a new document, photo of the jungle:


Write you text:


Now, apply the following effects:


The camouflaged text effect is ready.


Copyright © http://megatutorials.blogspot.com

AddThis Social Bookmark Button

Aug 21, 2007

Orange menu with a steel stroke.

Adobe Photoshop Tutorial

click on images to see their original size

Learn to create a stylish orange menu with a steel stroke.


Let’s start with creating a new document, with 350px by 300px with a black background.


Using a Rounded Rectangle tool create a rounded rectangle as on the picture:


And apply to it the following effects:


Now, with a Rectangular Marquee tool create a selection as it is shown:


After than create a new layer, and fill it with this gradient from up to down:


Our first button is ready:


Now, duplicate this layer as many times as amount of buttons you’re going to have:


Name each of this buttons:


How to show that one of our button is active? Easy, just marquee one of them, for example Products. Create a new layer, and fill it with this gradient:


After that, take a Pencil Tool with a diameter 1 px and draw inside two lines, with a #ffb45a color at the top of the button, and with a #ec8100 at the bottom. That is how our menu must look like:


Empty space in the top of the menu can be used as a place for your logotype, like this for example:


Let’s add a little highlight to it. Marquee the top of the menu:


Create a new layer, and fill it wit a gradient from white to transparency, like this. Press Ctrl+D to deselect. Our menu is done:


Copyright © http://megatutorials.blogspot.com
AddThis Social Bookmark Button